Monday, February 13, 2012

Nursery Preview

Okay, so I told you I was going to share with you my inspirations for our second daughter's nursery. I am so excited to get started on this, I seriously can't wait to start demolition!
I haven't narrowed down the EXACT shade of gray I want to paint her walls, but I'm thinking something similar to this wall color {Benjamin Moore's Stonington Gray HC-170}:

And as far as the furniture goes, we still need Addison to keep her crib, especially since it will convert for all the stages she needs it for, so we're going to get a new crib for Zoey, along with a rocker/glider (which I never had with Addison because I didn't think I needed it & now I realize how wrong I was), a changing table,and a new dresser. BUT if I can find a great dresser that could double as a changing table, we'll just get that one piece. I'm still undecided, but here is what I'm hoping for:

Graco Avalon Glider/Ottoman Classic White.Opens in a new windowThis awesome Graco glider..Graco Charleston Classic Convertible Crib Classic White.Opens in a new windowwith this cute crib

Pinned Image A dresser painted this gorgeous color and stuck inside her closet with this pattern painted onto the closet walls:

IMG_2335

Pinned Image I'm in love with this bedding, but it's a little pricey...I'm hoping to find something very similar to it!

Pinned Image I also will be making this kind of mobile, just with different colors.

definitely making a Z like this! This {but obviously a Z}

I have SO many more ideas, but you would need to see a drawing instead of just pictures. Demolition will be Friday and Saturday and we will start painting hopefully early next week. I will post lots of pictures of the transition. For now, sweet dreams...

Saturday, February 11, 2012

Living Room Painted

So for a pretty long time now, we've been working on painting our living room. We're still not done, unfortunately. But you can't tell-at least not in these pictures, hahaha. Our walls were paneled when we moved in. We painted them white and then thought it was too much white, so we ripped the paneling down. We had to sand down all of the glue and mud A LOT. Then we painted Valspars Sandstone Beige onto the walls.


I love the color now! We ripped out our trim to replace it and like I said, we still need to do one last coat. The back door will be replaced with a clean, white one and the mantle still needs to be stripped of the paint and re-stained a deep brown. We also removed beams from our ceiling that were there for decoration and we will be putting beadboard up to cover up the outdated popcorn ceiling. And then we will add photos and art to our walls to make it more home-y. I'll show you the pictures of the ceiling once the beadboard is up so you can see the before & after.

Garage Nightmare

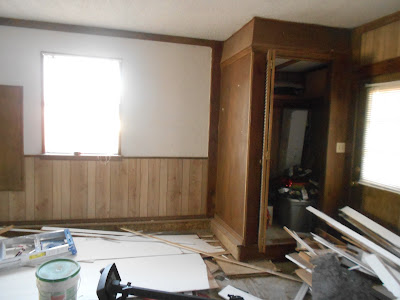
In my previous post, I showed you pictures of the guest room we cleaned up to turn into a nursery. We took a bunch of stuff and put it in boxes and piled them in the garage. I don't have any pictures of the garage from when we moved in, but the only real difference between then and now is that it had carpet and there was nothing in the room. It wasn't even a garage when we moved in. It had been, at one point. But somewhere along the line, it was converted into an extra living space. The problem is that it wasn't done right. They didn't insulate anything and they threw thin carpet down over the concrete. Everything was wood-the paneling, the weird storage spaces, and then there was a weird wet bar area. Everything about this room is just wrong. Well since we've moved in, we call it the garage, because it doesn't deserve the name "family room", which is what it will be when we're done with it. And it's been our project/storage place. We've only ripped up the carpet, but it looks crazy from all of the projects we've done in there and all of the trash we've thrown in-things like trim, extra wood, flooring, whatever. After we moved more stuff in here from the guest room, I took pictures. Here is our (shameful) "garage"

This is what you see when you walk into the room and look to your right. SCARY, I know!

 This is the view when you look straight in

This is on the left side, but closer to the front

The exterior door is the other left side of the room and the interior door goes into our house.

This is the full view of the room when you face back towards the entry into the house. On the left is the wet bar area. When we're ready to update this room, we're going to take the wet bar out and use that opening to go into the living room. We'll also close off the area where the interior door is and move our washer and dryer into this room (concealed, of course) and make our current laundry room into a pantry, since we currently don't have one. BIG plans we have, but we will have to wait until next year. This room will be SO different once it's completed!


Guest Room Clean Up

This post will be a little embarassing to share, because of the chaos involved. I have always been a neat, organized freak and this room shows quite the opposite of that. Our guest room had morphed into an office, a craft room, and a storage space. We've been doing so many house projects at once for awhile and everything just kept getting piled up and neglected. SO, without further ado (spelling?), here is the mess of a room.

This would be my ever-so-lovely craft table, with lots of stuff underneath in "storage"


This is what you get when you walk into the room: small table, desk and bookshelves right in your face.

And this is the closet. I really don't have much to say. A picture is worth a thousand words. 

Stephen (my wonderful husband) & I spent at least two hours getting rid of stuff we didn't want and moving things into the garage-turned-living-room-turned-cold-storage-space. The room went from this crazy mess to this:

We cleared out the bookshelves and cleaned up the desk, which we will be moving into our bedroom for a little while sometime this week.

The closet is much cleaner, but I couldn't resist packing up my craft supplies. Not now, so they will be there for a few more days as well, but will have to be moved into some storage space. Like the kitchen table. Hate that.

And no more craft table, just a nice big empty wall!! I can't wait to put the crib here. I will definitely be showing you some of what we have planned for our second nursery. SO excited! Demo begins this week!! :)


Wednesday, February 8, 2012

Target Coupon Deals


About 2 weeks ago, I scored some more awesome deals at Target! It's taken me forever to post about it, but here it is!

What I got:
(2) 3oz. bags of IAMS dog food-$3.00
Used (2) $3/1 IAMS cat/dog food
Final Price: Free, plus there are coupons for a free trial size inside each bag, which equals 2 more free bags of dog food! (For those of you who know we don't have a dog, I got this for my family who does!)

(6) Aquafresh Trial Size Toothpastes-$1.00 each
Used (6) $1/1 Aquafresh, any
Final Price: Free

(2) BIC Disposable Razors-$2.79
Used B1G1 Free BIC Disposable
Final Price: $2.79 for both, or $1.39 each

Almay Smart Shade Blush-$5.41
Used $3/1 Almay Smart Shade Target Coupon
& $2/1 Almay, any manufacturer
Final Price: $0.41

Total Retail Value:  $22.99
What I Paid: $3.20 plus some change in tax

Monday, February 6, 2012

Target Makeup Deals


This past Saturday I went to Target and scored some super great deals on makeup! I found a ton of stuff on clearance and then had a bunch of coupons, so I got this all for practically nothing.

Here's What I Got:
Almay Smart Shade Concealer, on clearance for $5.41
Used $3/1 Almay Smart Shade Product
and $2/1 Any Almay Product
Final Price: $0.41

LOREAL Eyeshadow, on clearance for $2.75 (I got 2)
Used (2) $1/1 LOREAL Eyeshadow/Eyeliner Product
Final Price: $1.75 each/$3 each

LOREAL Paris Nailcolor, on clearance for $1.97 (I got 2)
Used (2) $1/1 LOREAL Paris Nail Product
Final Price: $0.97 each

Covergirl Lipslicks, on clearance for $2.47
Used $2.50/2 Covergirl Products,any
Final: $2.47

Total Retail Value: $33.38
What I Paid: $7.19 {including tax}